
The Measurements Patterns Never Ask For
And why your fit suffers without them

I asked a simple question in my general chat last week:
“What’s one measurement you wish commercial patterns asked for? Mine would be hip level, what’s yours?”
Within minutes the responses were pouring in.
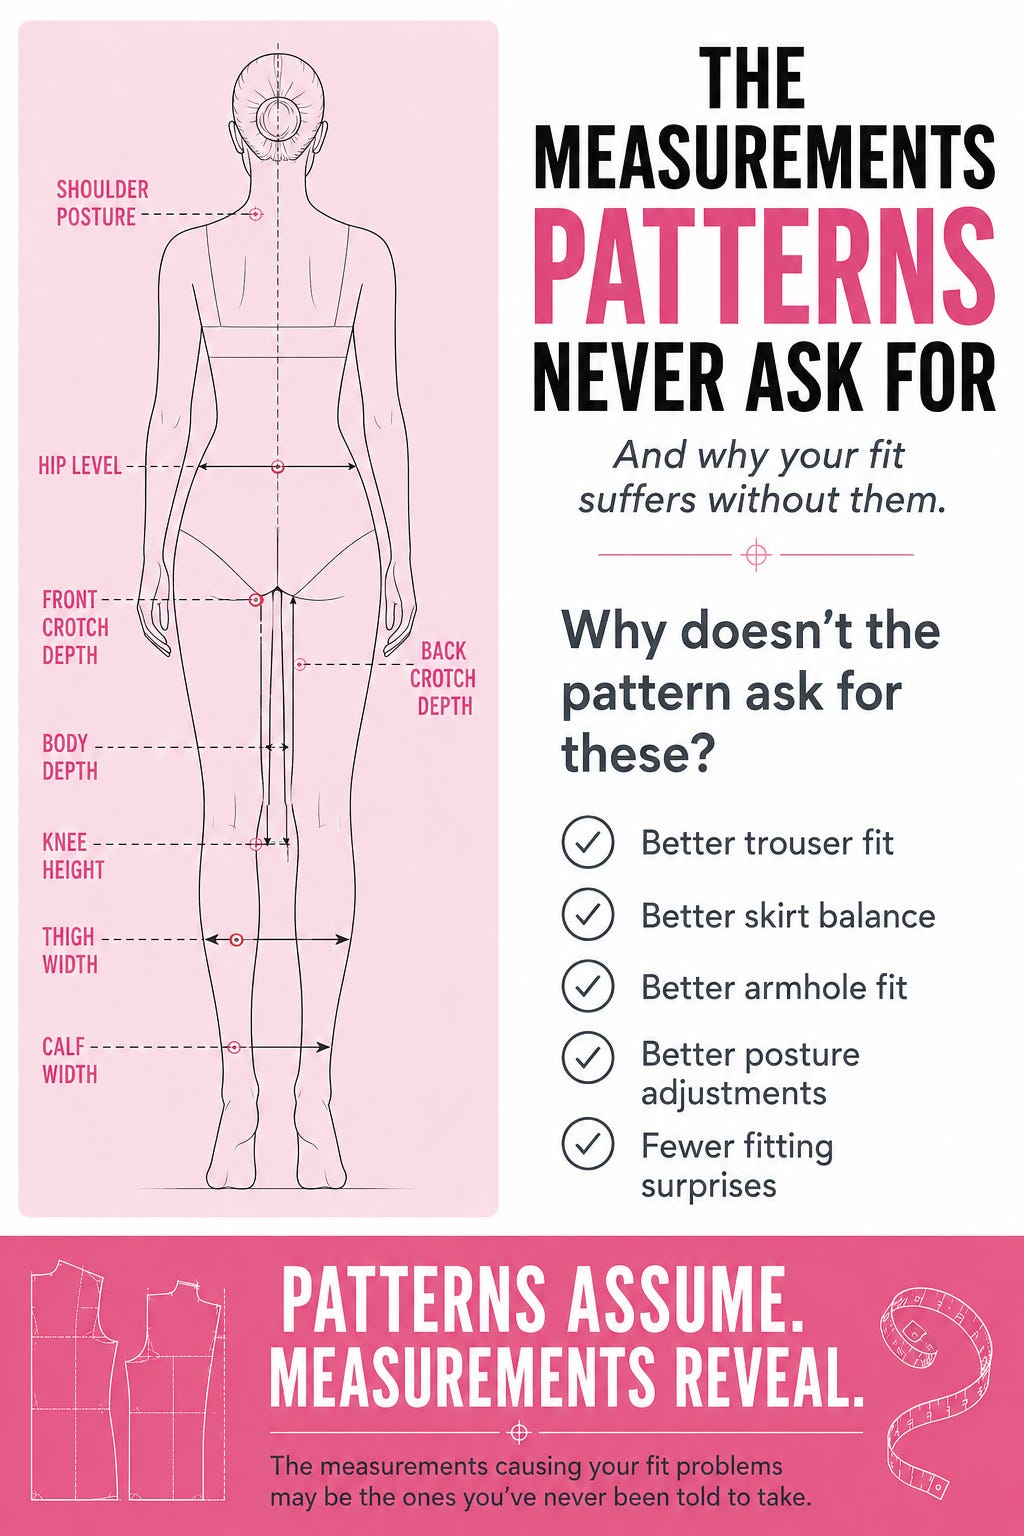
Crotch depth. Rise length. Knee height. Thigh width. Calf width. Body depth. Shoulder posture. Waist angle.
Everyone had an answer. And every answer pointed to the same problem:
Patterns make assumptions about your body without telling you what those assumptions are.
LESSON 1: PATTERNS ASSUME YOUR HIP LEVEL IS 7-9 INCHES FROM YOUR WAIST BUT REAL BODIES RANGE FROM 4 TO 11 INCHES
Standard drafting systems assume hip level sits 7-9 inches below the waist:
Helen Joseph Armstrong: 7”
Winifred Aldrich: 8”
Vogue/Butterick: 9”
But in my general chat alone I heard from:
A short-waisted person whose full hip level is 4” from waist
A tall person (5’11”) whose high hip is 4” but full hip is 10”
An experienced sewist who always reduces rise height by 2” on every toile
A petite sewist who pointed out that knee height is never where patterns assume it to be
Someone who wished patterns asked for thigh width and calf width, not just hip circumference
Same number (4”), completely different bodies, completely different fitting needs.
When a pattern assumes 7-9 inches and your hip level is 4 inches, the waistline sits in the wrong place. The hip curve is drafted for a location that doesn’t exist on your body.
This is why skirts and trousers consistently fit some people perfectly and others never at all.
Behind the scenes: I’m currently drafting blocks for a client whose hip level came in at 11 inches from the waist. That’s at the very top of the longer range and completely correct for her body. Standard patterns would place her waistline nearly 2-4 inches too low.
The range of real hip levels I’ve encountered in beta testing alone: 4 inches to 11 inches. Standard patterns account for none of this variation.
What to do: Measure your hip level. Tie a piece of elastic around your natural waist, then measure straight down to the fullest part of your hip. That number is your actual hip level and it may surprise you.
LESSON 2: PATTERNS NEVER TELL YOU THE CROTCH DEPTH THEY WERE DRAFTED FOR SO YOU CAN’T DIAGNOSE WHY YOUR TROUSERS DON’T FIT
One of my chat members said it perfectly: “I also wish patterns told you what the crotch depth is front and back.”
She’s right. And here’s why it matters so much:
Front and back crotch depth are different measurements that affect completely different fit problems:
Back crotch depth affects seat fit and pulling
Front crotch depth affects comfort when sitting and standing
Most block-making instructions use hip size to estimate crotch length rather than measuring it directly. But crotch length isn’t just a proportion of your hip measurement.
My back crotch length is almost 3 inches longer than my front. Simply dividing the total crotch length by two would lead to a poor fit.
You can’t fix what you can’t measure. And you can’t measure what patterns never asked for.
How to measure it accurately:
The common method, running a tape from center front through the legs to center back is inconsistent. It gives different results every time.
A more accurate method (from Maria at dresspatternmaking.com):
Wear a pair of snug stretchy bike shorts
Tie firm elastic around your natural waist
Attach non-stretch twill tape at center back of the elastic
Pull it through your legs and up to the front
Adjust until snug but comfortable
Wear it for 10 minutes—sit, squat, move
Mark the front-back division point between your legs
Remove and measure front and back lengths separately
This gives you a wearable reference, you feel and adjust the fit before transferring the measurement to your pattern.
My readers have shared their own variations:
One uses a piece of tape with a knot to simulate the crotch seam, with marks where it hits the front and back waistline. Removing the tape allows a flat measurement of all the relevant points.
Another discovered a method using aluminum foil: bunch 3-4 feet of foil lengthwise into a roll, press it firmly against yourself from front waist to back waist, mark the center crotch with tape, then place the molded roll against your pattern. She also noted: “It helped me see that my butt is not as flat as I thought it was, I actually needed to add 2.5 inches to the back of the pants.”
The crotch measurement patterns never ask for is the one that determines whether trousers are comfortable to wear or just comfortable to look at on a hanger.
For a full step-by-step guide on measuring crotch depth, read my post:

LESSON 3: PATTERNS ASSUME SYMMETRICAL BODIES BUT MOST BODIES HAVE SOME ASYMMETRY
Standard patterns are drafted as half pieces cut on fold. This assumes both sides of your body are identical.
Most bodies aren’t.
Leg length differences. Uneven shoulders. One side wider than the other. These are normal human variations that standard patterns completely ignore.
I recently drafted a skirt for a client with natural body asymmetry. Instead of drafting a half piece cut on fold, I had to draft a full front piece and a full back piece separately.
Cutting on the fold assumes symmetry. For asymmetrical bodies, that assumption creates a garment that will never hang straight.
LESSON 4: PATTERNS DON’T ASK FOR BODY DEPTH (FRONT TO BACK) WHICH AFFECTS ARMHOLE FIT MORE THAN CIRCUMFERENCE DOES
Most people focus on circumference measurements (bust, waist, hip). But body depth, the front-to-back measurement affects how patterns fit in ways circumference never captures.
A person with a shallow body depth and a person with a deep body depth can have the same bust circumference but completely different armhole fit needs.
This is especially true for the armhole. The depth of the armhole needs to match the depth of your body, not just the width.
Circumference tells you size around the body. Depth tells you how that size is distributed front to back. Good pattern drafting needs both.
LESSON 5: PATTERNS DON’T DISCLOSE THEIR POSTURE ASSUMPTIONS AND POSTURE AFFECTS EVERYTHING
One of my most experienced chat members said something that stopped me:
“With both commercial patterns and drafting systems, there are many undisclosed assumptions about the body it is for. I wish they told us the type of body (shoulder posture, waist angle, body depth etc). Then we could more easily know how to make the adjustments we need.”
She’s right. And it applies to drafting systems too, not just commercial patterns.
Every system was developed with a specific body in mind:
Forward or straight shoulders
Swayback or upright posture
Rounded or flat back
But that body is never described. You only discover the assumptions when something doesn’t fit and you have to work backwards to understand why.
Patterns don’t just assume your measurements. They often assume your posture and proportions too and those assumptions are usually hidden.
LESSON 6: ONCE YOU KNOW YOUR HIDDEN MEASUREMENTS, YOU STOP FIGHTING PATTERNS AND START WORKING WITH YOUR ACTUAL BODY
One chat member learned about hip level from a fitting course. Before that, she’d never measured it because patterns never asked for it.
Once she knew her hip level, she could adjust patterns confidently instead of guessing.
Another member has been reducing rise height by 2” on every single toile for years. That’s not a hack. That’s a system built from understanding her body.
The sewists who fit patterns most confidently aren’t the ones who follow instructions most carefully. They’re the ones who know their bodies most completely.
The measurements patterns never ask for are the ones most worth knowing.
WHAT TO DO NEXT
If you’ve been struggling with fit and can’t figure out why, it might not be your technique.
It might be a measurement you’ve never taken because no pattern ever asked for it.
Start here:
Measure your hip level (waist to fullest hip)
Measure your front and back crotch depth
Note your posture (forward shoulders? swayback?)
Measure your body depth at key levels, front to back.
Measure your knee height (waist to knee)
Measure your thigh and calf width if you sew trousers
These measurements won’t appear on your pattern envelope, but they can tell you far more about fit issues than the standard measurements ever will.
If you want to build patterns from your actual measurements and not assumptions, start with the foundation.
The Basic Pattern Set teaches you how to draft a bodice, sleeve, and skirt block from scratch using your own measurements.
Not a standard size. Not an average body. Yours.
And if you want custom blocks drafted for you send me a DM (direct message). 3 spots remaining.
A quick note on spots: I’ve had more interest than I expected when I started this beta phase, which is humbling and exciting. But interest and commitment are different things. Some people are still deciding. Some are working out the payment process. Some have life happening.
So when I say 3 spots remaining, I mean 3 spots I’m confident are still open for someone ready to commit today.
If you’ve been thinking about it, this is your sign.
Here’s what you get:
✓ Bodice block
✓ Sleeve block
✓ Skirt block
✓ Seamly2D parametric files (yours forever, update your measurements anytime)
✓ A4 + A0 PDFs ready to print
✓ Detailed instructions
✓ Two rounds of adjustments
✓ My direct support throughout
$100 for the complete set.
Send me a DM (Direct message) to get started.
As a patternmaker in training you have just ROCKED my world in my patternmaking process...thank you for the great read